

Download and Install Sitecore Headless Rendering
Download the Sitecore Headless Rendering Package from the Sitecore Headless Rendering | Downloads | Sitecore Developer Portal according to your Sitecore version.
Log in to Sitecore.
Upload and install the package.
Create a Headless Tenant and Site
Right-click on Content, click Insert, and select Headless Tenant.
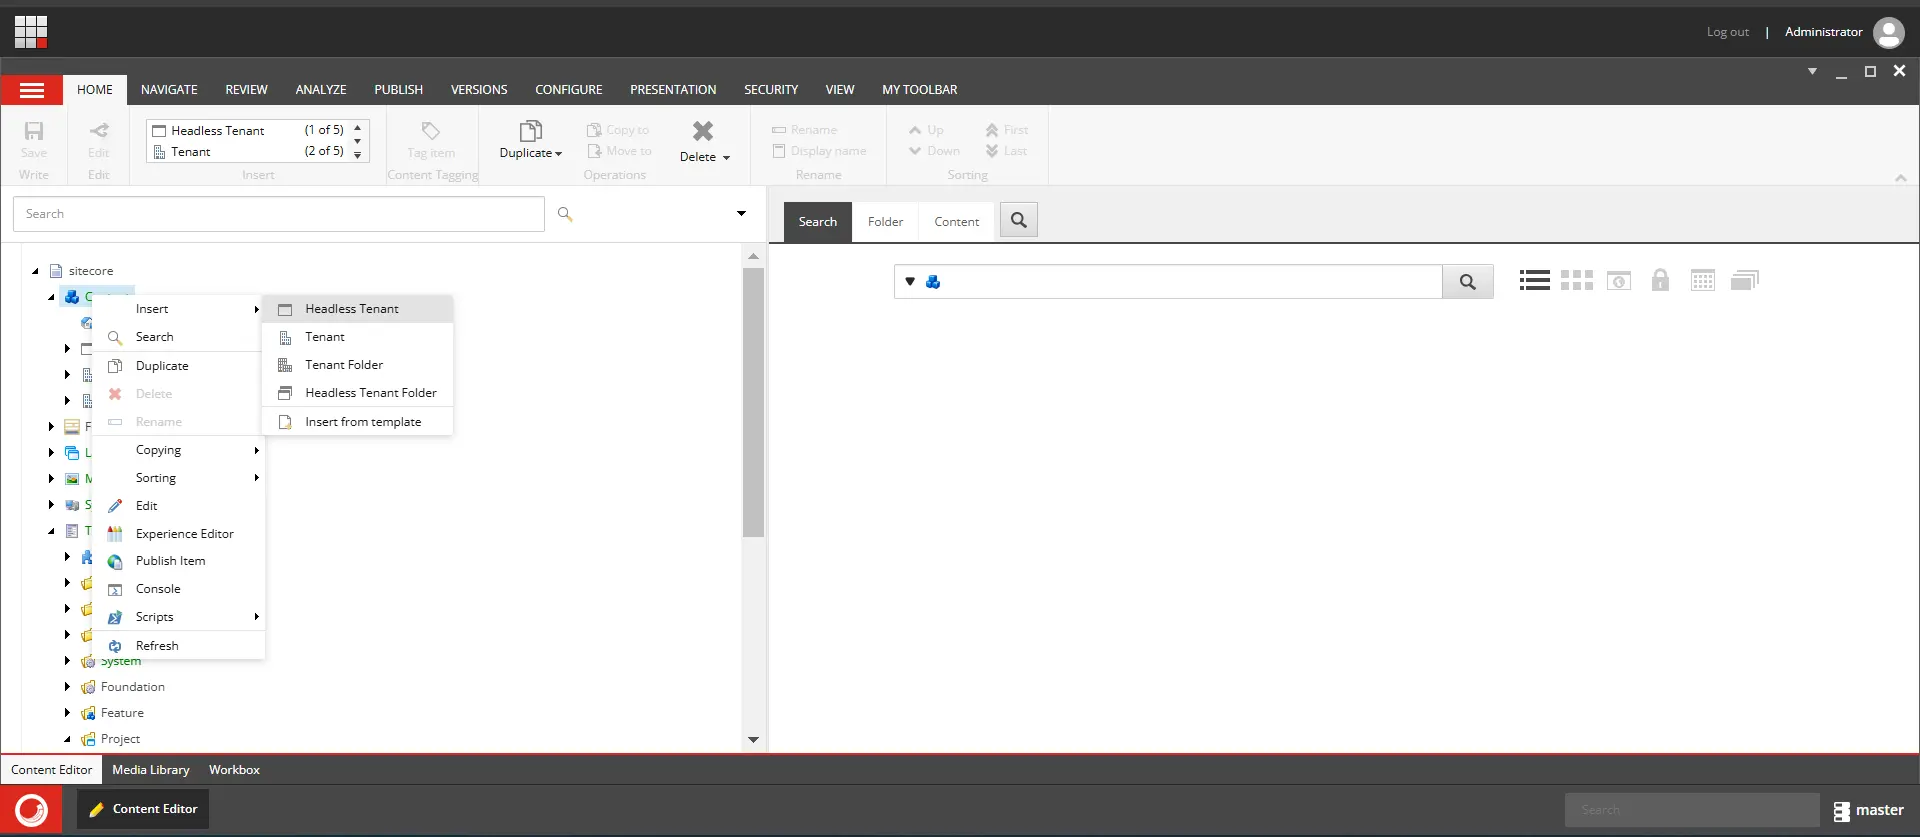
hmac=d4f579dca088b55292aef6df7f0358aac80e6a6fecfa401481cf11e31d1861ce" alt="headless tenant" width="500" height="218">
Give it a name (e.g., HeadlessTenant).
Right-click on the Tenant , click Insert , and select Headless Site.
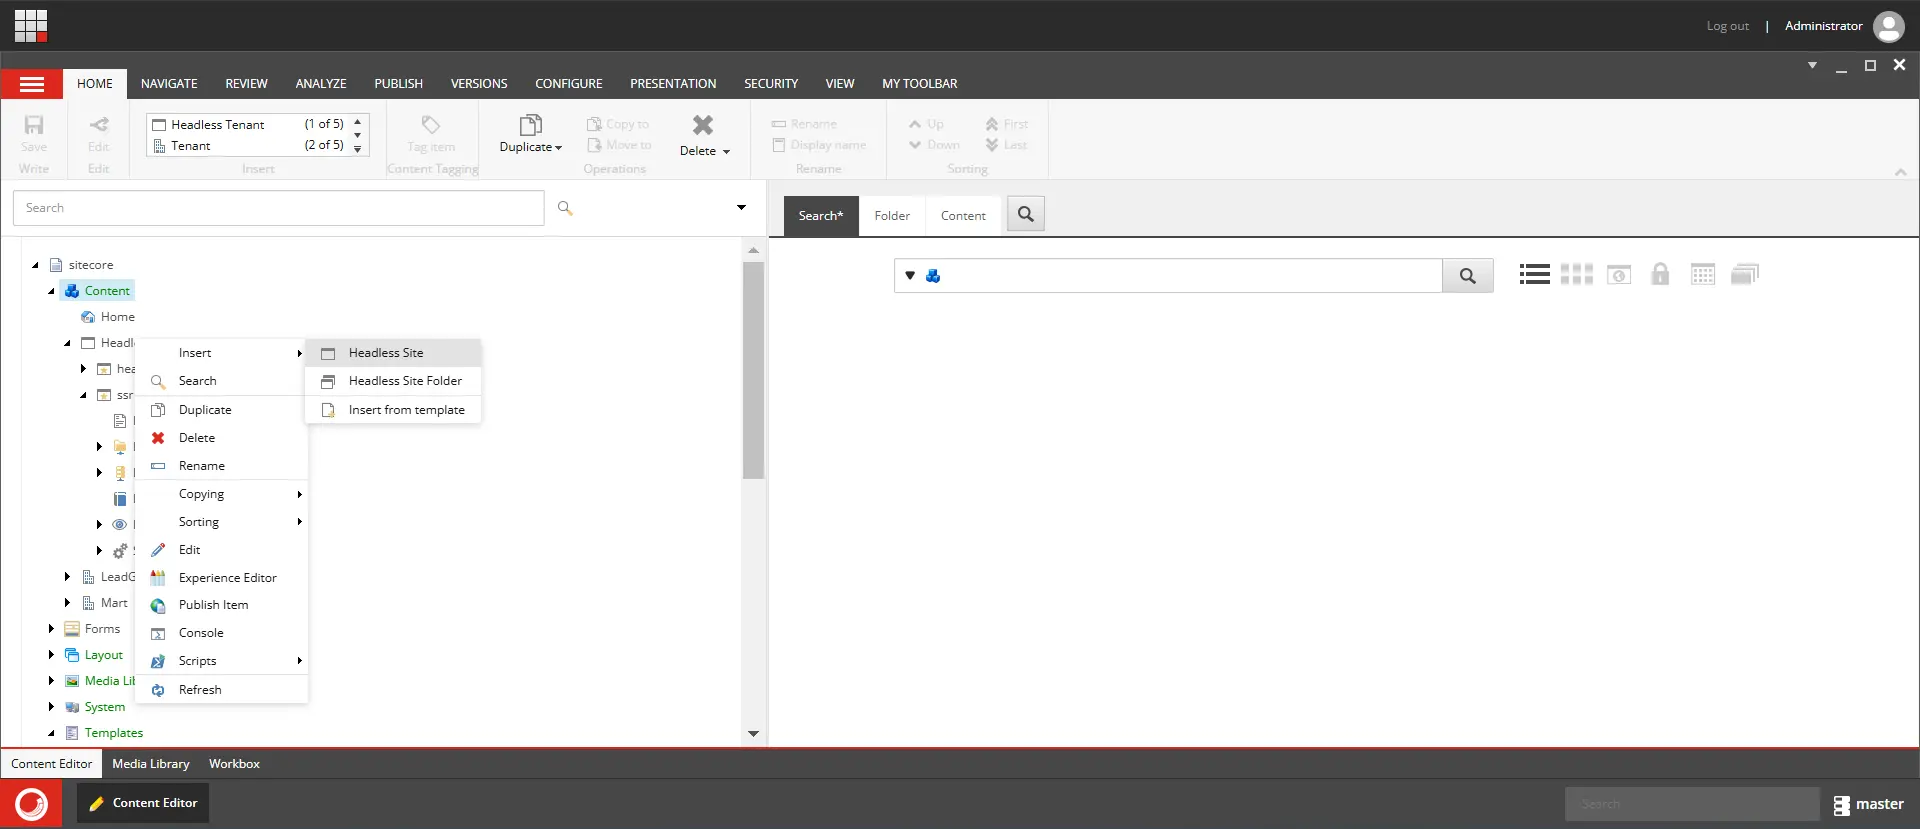
Give it a name (e.g., HeadlessSite).
Create a JSS API Key
Navigate to /sitecore /system /Settings /Services /API Keys.
Right-click on API Keys, click Insert, and select API Key.
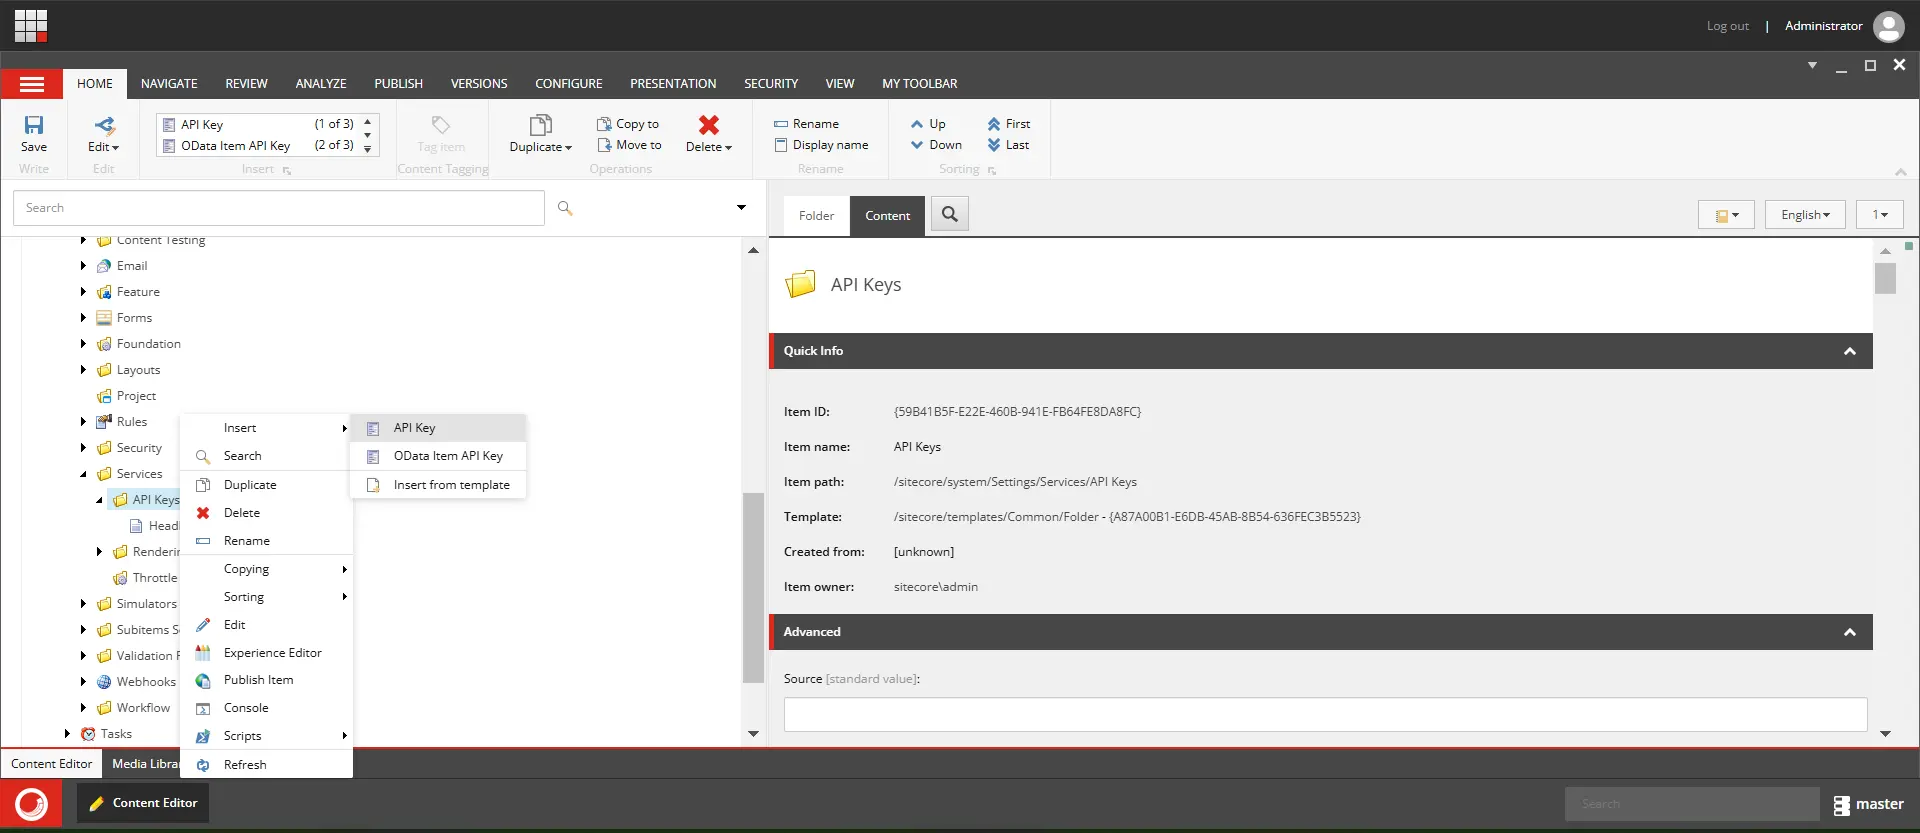
Name it (e.g., HeadlessAPI).
Update the CORS Origins and Allowed Controllers value to * or your domain
Create a Next.js Application
Create an empty folder and open it with VS Code.
Open the PowerShell terminal.
Run the following command to install JSS CLI:
npm install -g @sitecore-jss/sitecore-jss-cliRun the following command to create a Next.js app:
npx create-sitecore-jss --templates nextjs, nextjs-sxa
--appName headless-nextjs-app --hostName
headless.dev.local --fetchWith GraphQL
Follow the prompts:
Where would you like your new app created?: Press Enter to use the default path.
How would you like to prerender your application?: Select SSG.
Are you building for Sitecore XM Cloud?: Select No.
If you encounter errors, check your Node.js version (e.g., use 22.13.1).
Setup Host Entry in IIS
Open IIS.
Select your site and click Bindings.
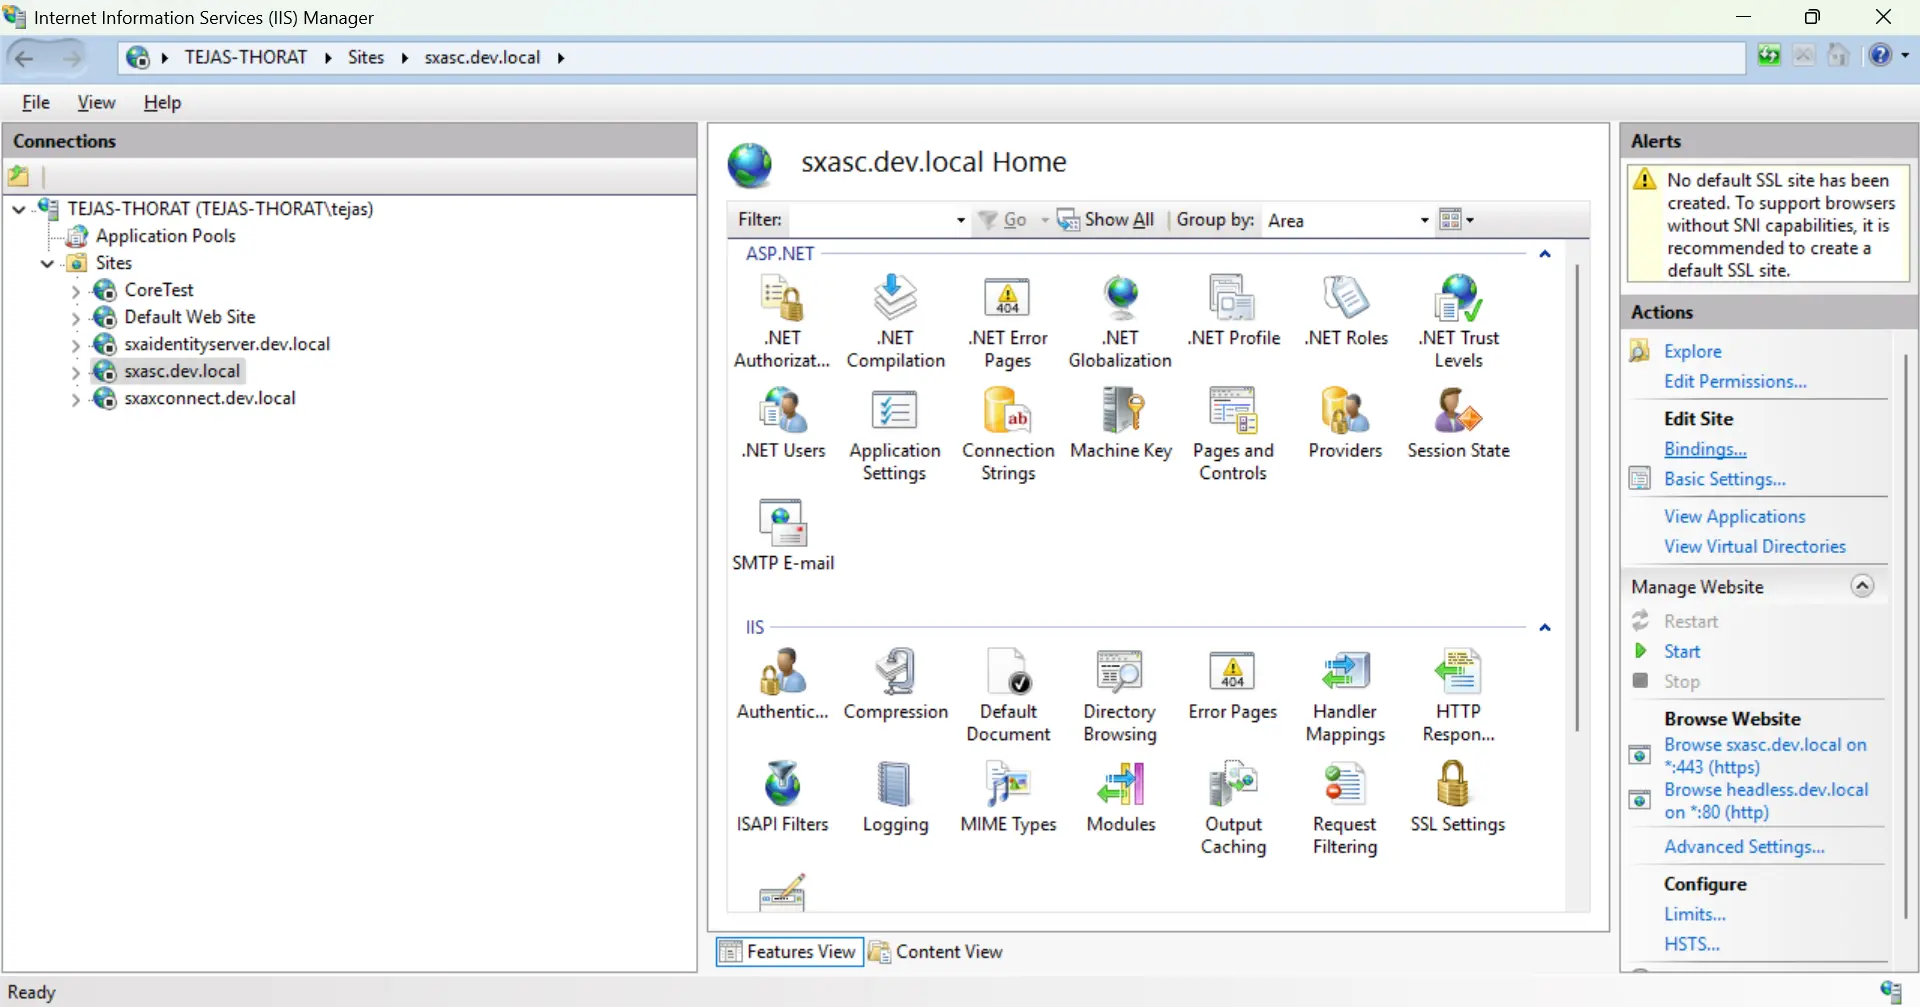
Add your host entry (e.g., headless.dev.local).
Configure Next.js App with Sitecore
Navigate to your Next.js app folder in the terminal..
Run the following command:
jss setupAnswer the prompts:
Is your Sitecore instance on this machine or accessible via a network share?: y
Path to the Sitecore folder: Enter your Sitecore instance path.
Sitecore hostname: http://your-hostname
Sitecore import service URL: Leave blank.
Sitecore API Key: Copy the API Key GUID from /sitecore /system /Settings /Services /API Keys /Your API Key.
Deployment Secret: Press Enterto generate a secret key.
Open scjssconfig.json, copy the deploySecret value.
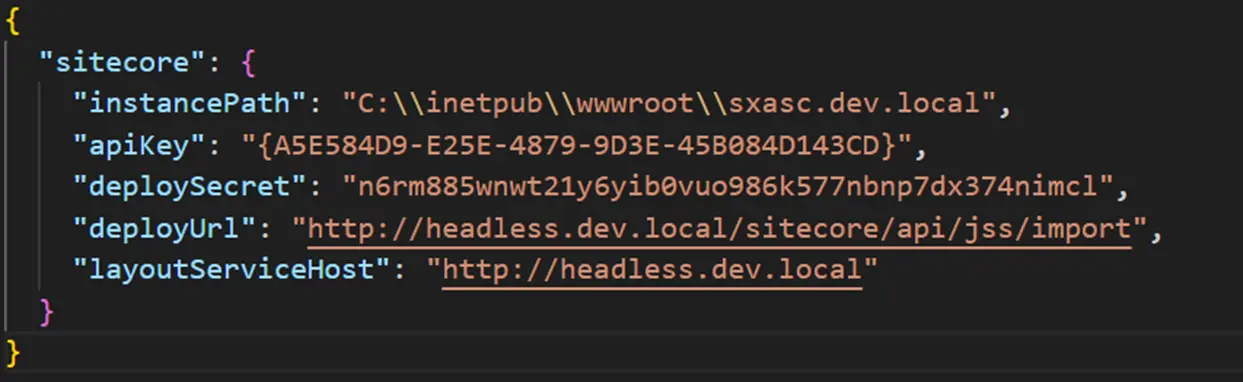
Open .env, find the variable JSS_EDITING_SECRET, and paste the value.
Additional Configuration
Open YourAppName.config, remove or comment out the site patch.
Open dictionary-service-factory.ts, paste your Home item GUID from Sitecore in the rootItemId field.
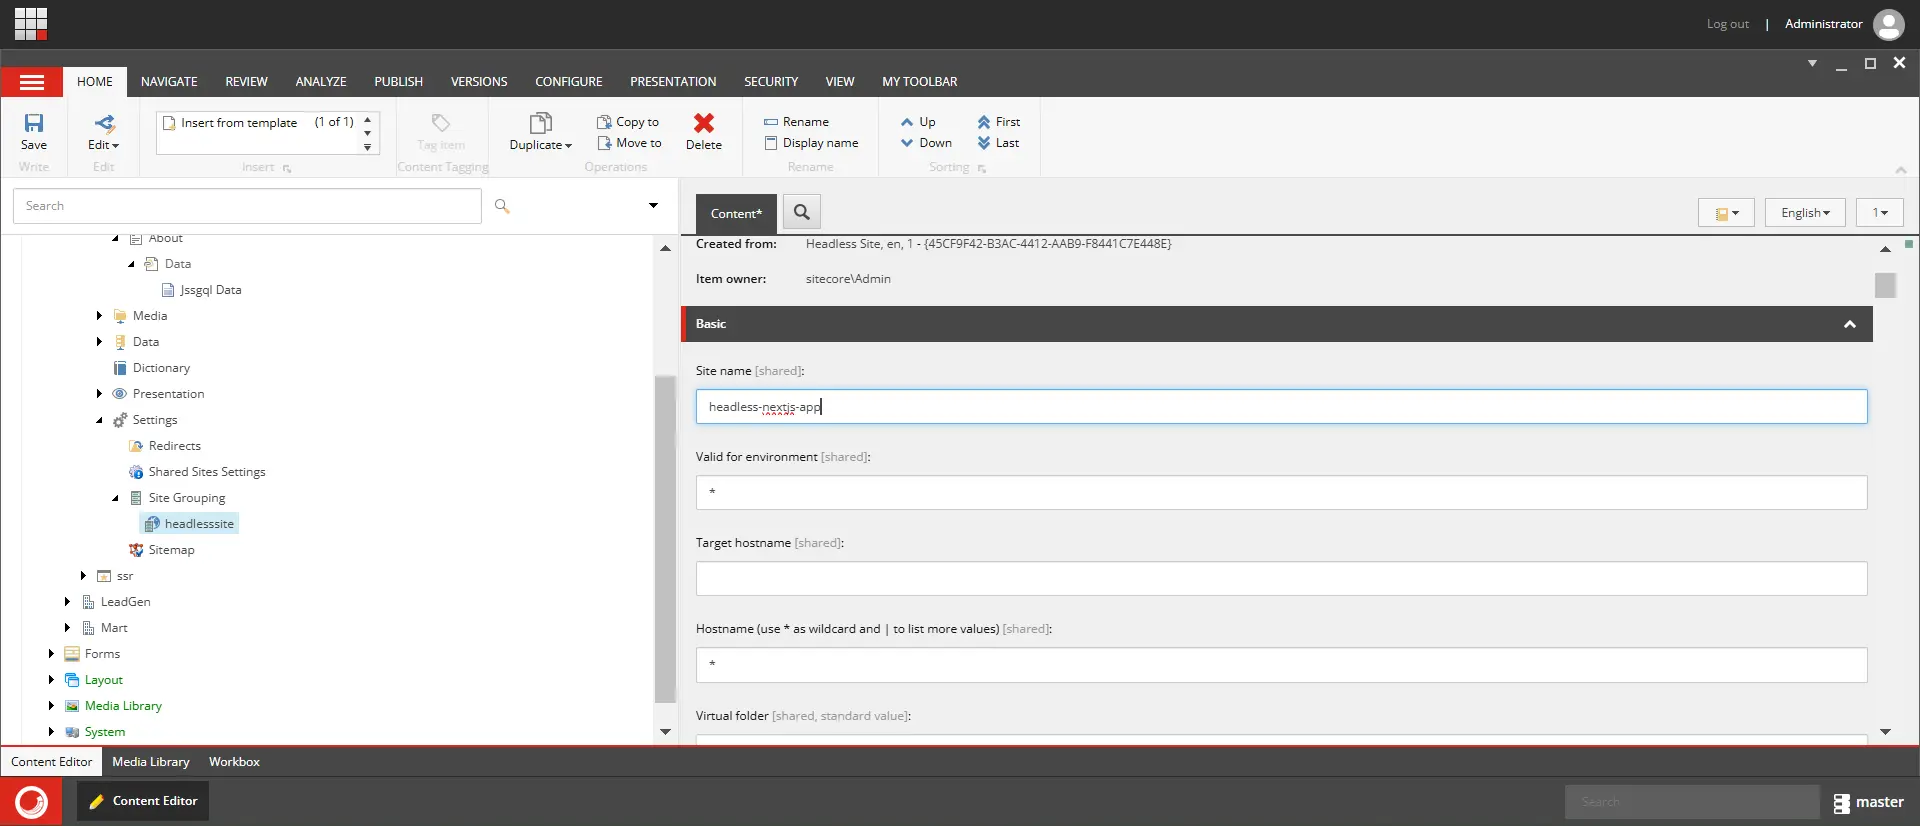
Update the Site Grouping:
Navigate to Site Grouping under Site Settings.
Find your Site and update the Site name label.
Configure Rendering Hosts
Navigate to /sitecore /system /Settings /Services /Rendering Hosts /Default.
Update the Server-Side Rendering Engine Endpoint URL:
http://localhost:3000 /api /editing /render
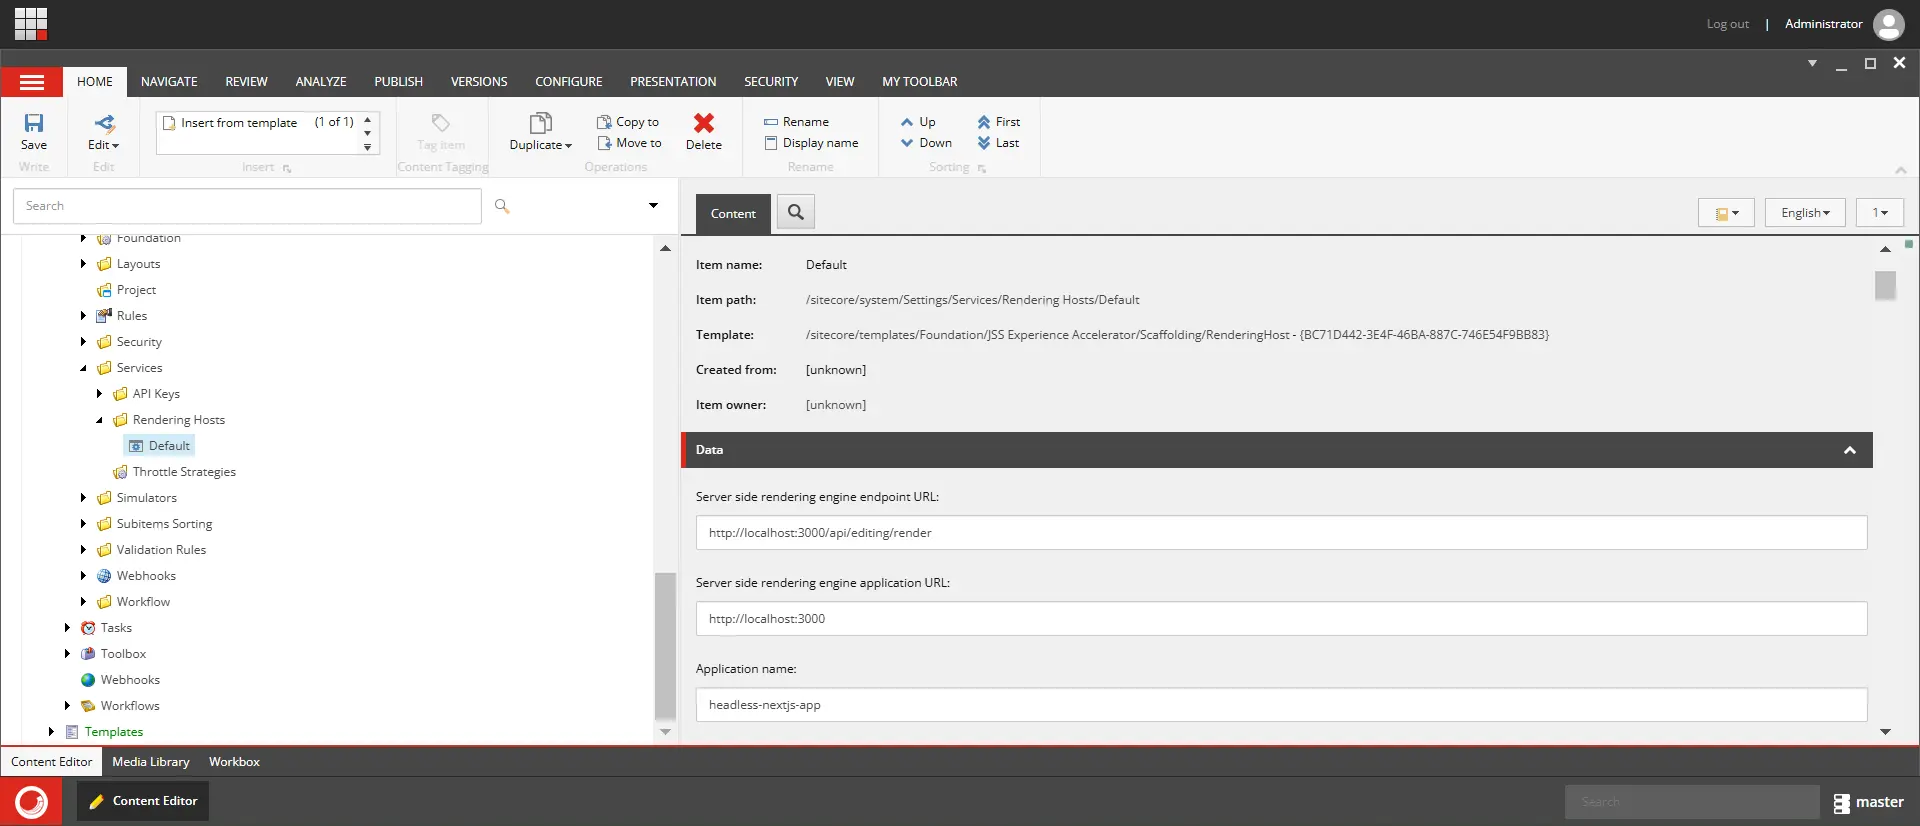
Update the Application Name.
Deploy and Start the Application
In VS Code, run:
jss deploy configjss start:connectedIn Sitecore, navigate to Home item and open it with Experience Editor
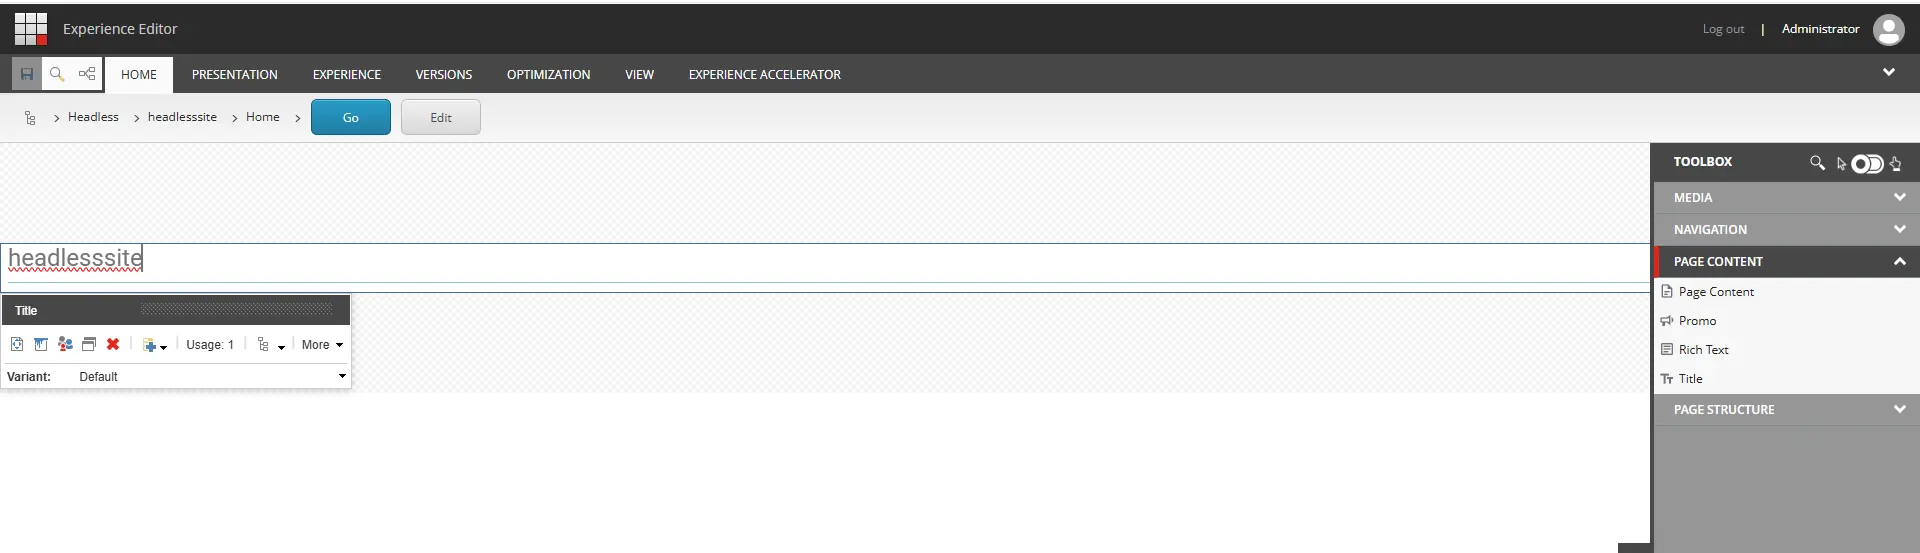
Open http://localhost:3000 in a browser. You should see the Title Component

Congratulations! You have successfully set up Sitecore JSS with Next.js using SSG.
Setting up Sitecore JSS with Next.js using Static Site Generation (SSG) may seem complex at first, but by following a structured step-by-step approach, you can have a fully functional headless application integrated with Sitecore. From installing Sitecore Headless Rendering and creating your tenant and site, to configuring the API key, setting up the Next.js application, and finalizing the deployment—each step builds a solid foundation for a performant, scalable, and modern web experience.With this setup, you now have the flexibility to develop components using React, manage content via Sitecore’s Experience Editor, and leverage the benefits of static site generation for improved speed and SEO. Happy coding!